How to integrate glasses on Shopify
Integration process
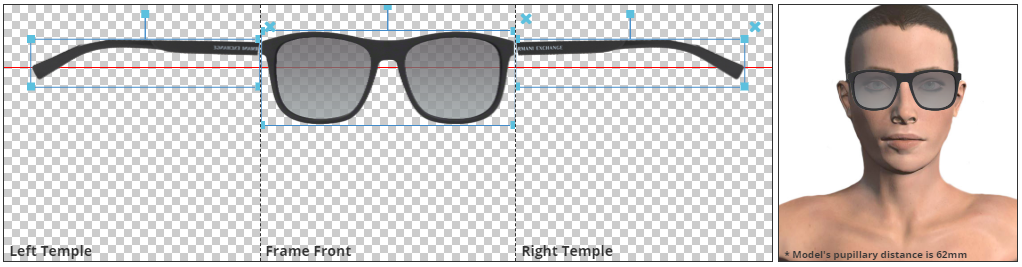
- Open the photos in a graphics editor software (e.g. Photoshop)
- Remove the background and all unnecessary parts that shouldn't be visible in a Virtual Try-On (e.g. temples behind the lenses)
- Save each file as a PNG with a transparent background (both frontal and the side view) (see next chapter: Product photo requirements)
- In the Virtual Try-On Shopify App go to Products
- Choose a product and click Add -> Glasses
- Upload the processed photos to the corresponding editor windows and set their size and position (you can also find a tutorial video in the description below the editor on how to set up the pictures)
-
Set the category, gender, and frame width (the default value is 135mm)
- Set the status to published and click Save
Product photo requirements
To integrate your products into Virtual Try-On, you will need two photos of each pair of glasses, one frontal and one side view (90-degree angle). You can find sample photos in this article to see what the images should look like.