How to integrate jewellery
Adding your products
You can add your products into our system by creating them manually one by one or you can set up an XML feed (more info here) and import all your products automatically.
Integration process
- Open the photos in a graphics editor software (e.g., Photoshop)
- Remove the background
- Save the file as a PNG with a transparent background (see next chapter: Product photo requirements)
- Go to the "Product Listing" page in our Client Dashboard
- Integrate the product
- If you have already imported your products with the help of the XML product feed:
- Search for the product in the list
- Click Edit icon
- If you will create the products one by one:
- Click + NEW PRODUCT
- Fill in the information about the product
- Select the Jewellery category
- Select a subcategory (earrings/necklaces)
- Click SAVE & CONTINUE
- If you have already imported your products with the help of the XML product feed:
- Upload the photo using the product editor
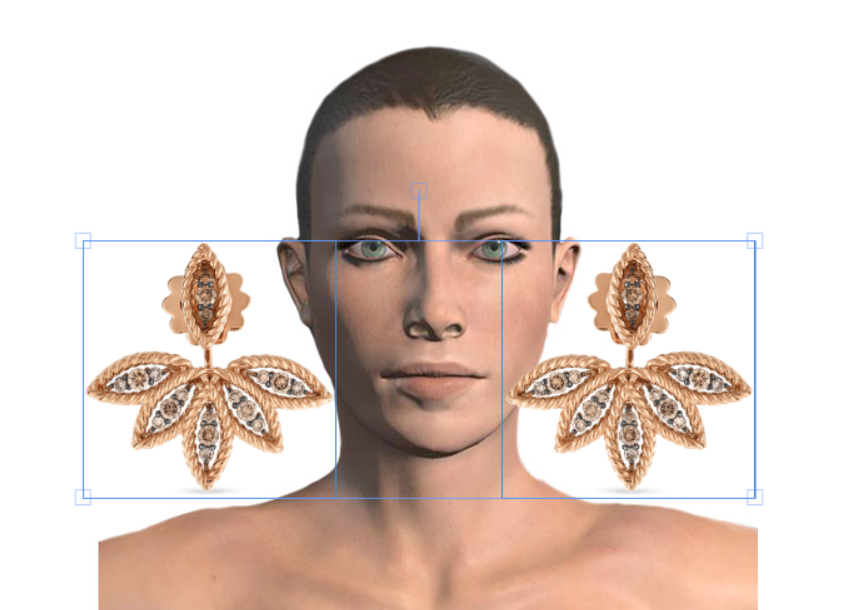
- In case you are uploading earrings, please upload only one of the earrings, since the editor automatically duplicates them. Select both images with the mouse cursor and set the correct size. Then place them one by one on the ears.

- Mark the product as published and click UPDATE or click UPDATE AND PUBLISH
Product photo requirements
You can find sample photos in this article to see what the images should look like.